A Raspberry Pi can readily run stand alone, connected with a monitor, keyboard, and mouse.
In order to set up your Raspberry Pi with a monitor, follow the steps below.
1. Connect your Raspberry Pi to your monitor using an HDMI cable. Connect your Raspberry pi to a power source (a laptop, USB wall charger, etc.) using a microUSB cable. Connect a mouse and keyboard to the USB ports on your Raspberry Pi.
- You may need a VGA to HDMI adaptor to connect the monitor to the Raspberry Pi.
- In the picture below, an iPhone wall charger is used as the power source for the Raspberry Pi. You may also plug the USB into a laptop or another power source of your choosing.
2. A terminal window will pop up and log in as “pi” with the password “raspberry”
3. If your screen is too big or flickering, you may need to adjust the resolution
- Open the Applications Menu (in top right corner of screen)
- Click “Preferences”
- Click “Raspberry Pi Configuration”
- Click “Set Resolution…”
- Choose an appropriate resolution for your monitor. (for example: CEA mode 16 1920×1080 60Hz 16:9)
- It will ask you to reboot. Click Yes.
4. Click the icon on the top left as shown below to launch C-STEM Studio.
![]()
C-STEM Studio in Raspberry Pi is the same as that in Windows and Mac OS X.
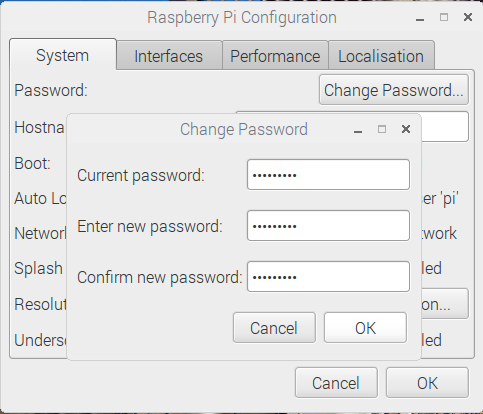
5. Change your login password through Graphical User Interface (GUI).
- Click the Start Menu (the raspberry icon in the upper left corner)
- Click Preferences, then Raspberry Pi Configuration.
- Click “Change Password…” and enter your new password.
6. (Optional) Change the host name of your Raspberry Pi.
If you will be using multiple Raspberry Pi’s wirelessly in one room at the same time as described in “Access Wirelessly”, you need to change the host name of your Raspberry Pi.
- Click the Start Menu (the raspberry icon in the upper left corner)
- Click Preferences, then Raspberry Pi Configuration.
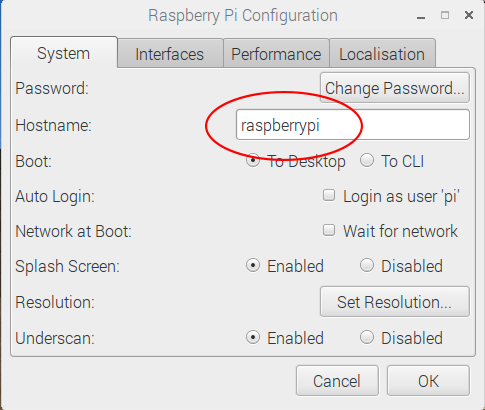
- Edit the text in the box next to “Hostname” (circled in the picture below). Remove the default hostname “raspberrypi” and type in a unique hostname, e.g.cstem1.
- Use the new hostname.local, e.g. cstem1.local, to access the Pi (3 step 2).
7. You may connect an Ethernet cable to Raspberry Pi directly to access the internet.


