A Raspberry Pi can run wirelessly if connected to a Wi-Fi network. Some Wi-Fi networks restrict the Raspberry Pi from connecting, so you may need to use a wireless router (as shown in the picture below). This may be desirable for a training session or in classroom teaching.
In order to set up your Raspberry Pi for wireless access, follow the steps below.
1. Access your Raspberry Pi as outlined in Access with a Monitor, Access from Windows, or Access from Mac OS X, depending on your machine.
Note: If you will be using multiple Raspberry Pi’s in one room at the same time, you need to change the host names of your Raspberry Pi’s as described in “Change the host name of your Raspberry Pi” in Access with a Monitor, Access from Windows, or Access from Mac OS X before they are connected to the network wirelessly. Each Pi must have a unique host name.
2. In C-STEMbian, connect Raspberry Pi to the same Wi-Fi that your laptop is connected to.
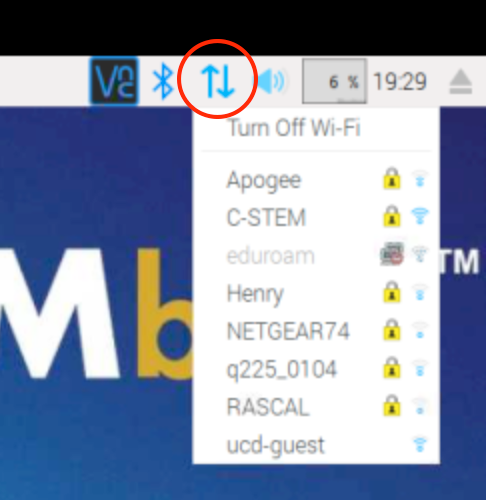
- Click on the two parallel arrows in the upper right corner of your screen (circled below).
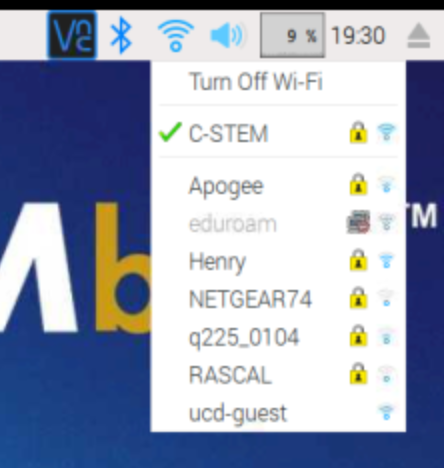
- Select the Wi-Fi network that your laptop is connected to from the pull-down menu and type in the password for the Wi-Fi network. Once it is connected, the arrows will turn into a Wi-Fi signal icon.
3. Obtain IP address and set up Static IP Address for the Raspberry Pi.
- Put your mouse on the icon for Wi-Fi for a second (without clicking)
- Write down the IP address (e.g. 192.168.1.104) associated with wlan0 in the float window

- Right click on the Wi-Fi icon and select “Wireless & Wired Network Settings”

- In the first pulldown menu next to “Configure:” select SSID. In the second pulldown menu, select the Wi-Fi network you are using on your Raspberry Pi (In the picture below, we are using the wireless network “C-STEM”).
- For “IP Address:” input the IP address you wrote down earlier (Step 3).
- Click “Apply”
4. Now, you should be able to disconnect the Ethernet cable from your Raspberry Pi and access it wirelessly through the VNC.
- As long as your laptop is on the same Wi-Fi that you established the connection with, you should be able to control your Raspberry Pi wirelessly.
- You can log in through VNC using your hostname (raspberrypi.local or a custom hostname if you changed it) or with the IP address you wrote down in Step 3. The password is “raspberry” by default.
- If you connect to a different Wi-Fi network on your laptop, you must reestablish the Wi-Fi connection on the Raspberry Pi by repeating steps 1-3.
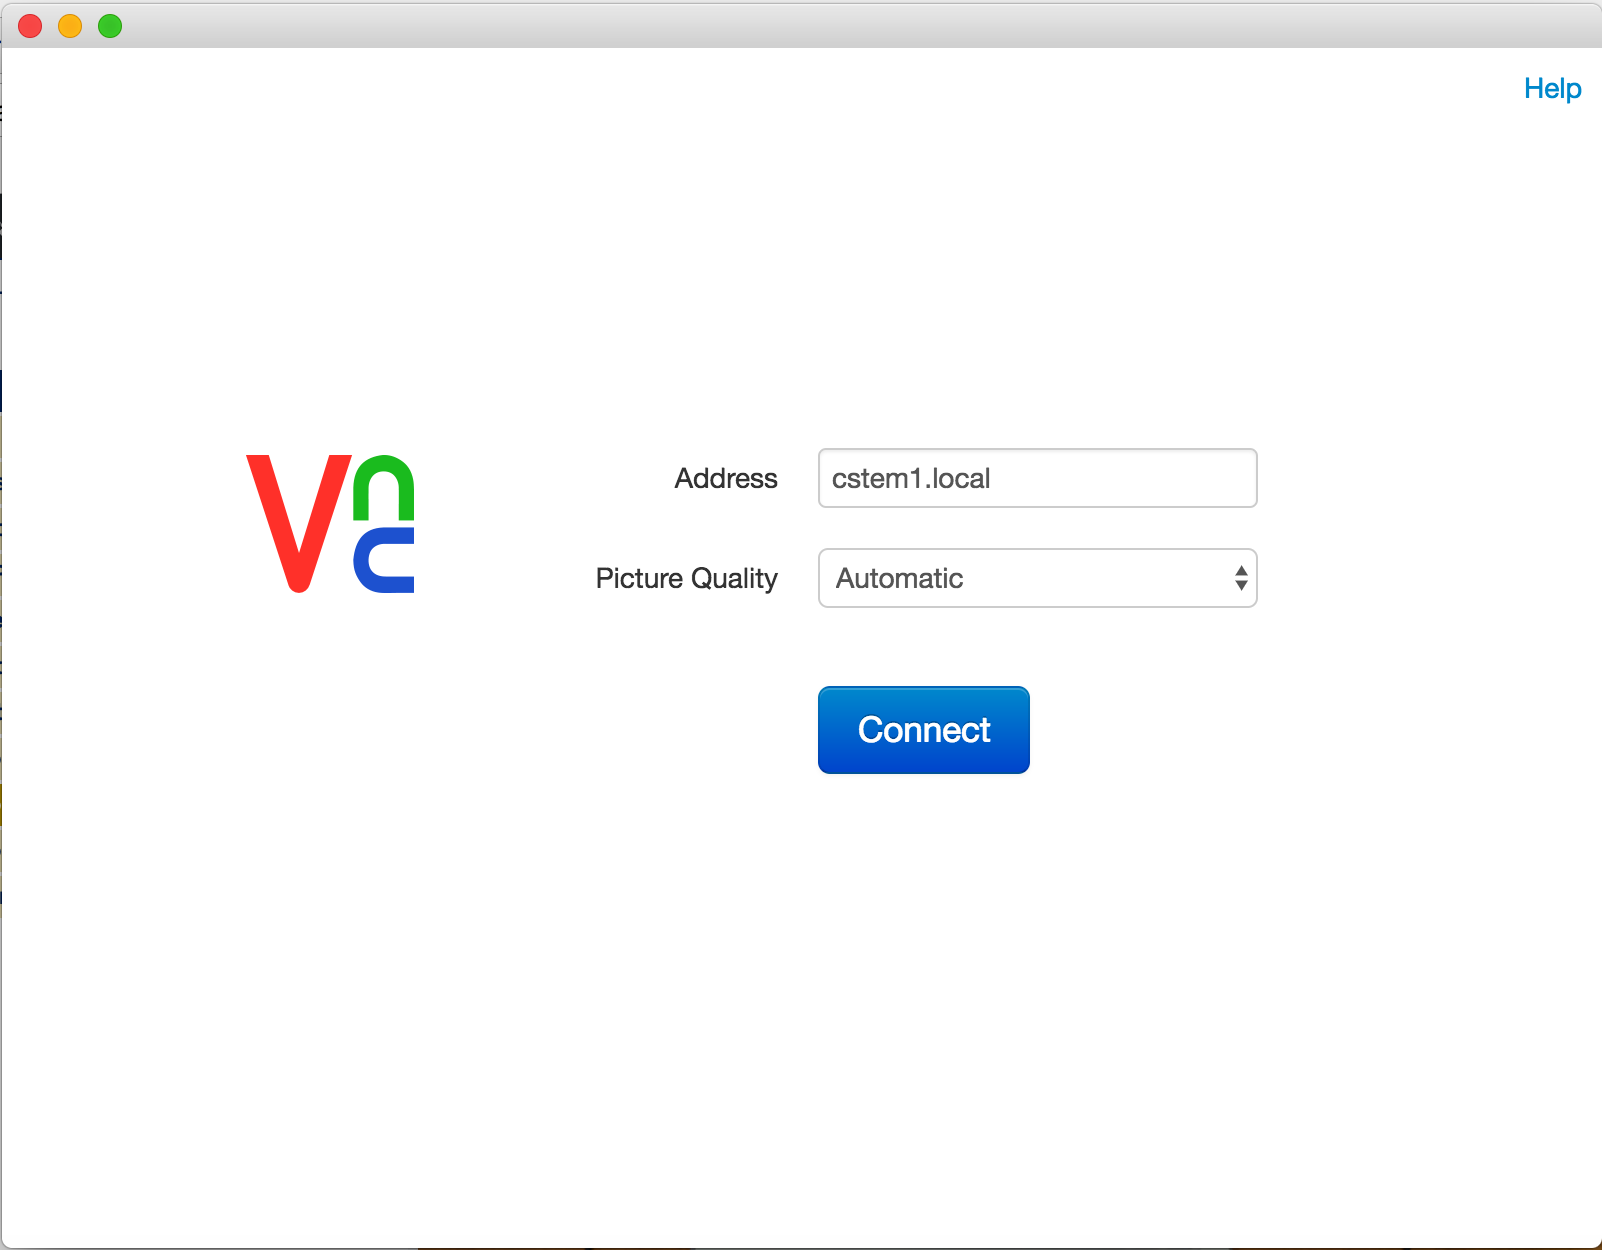
For example, we can connect a Raspberry Pi with the unique host name cstem1 or IP address through VNC as shown below.


