The latest C-STEM Studio v6.0 has many new features. It bundles the latest Linkbot Labs 2.0 and allows the user to control hardware Linkbot and Arduino from RoboBlockly directly. You need to register on our web site first to download.
Login and then click here to download C-STEM Studio v6.0 version
If you are an IT Personnel please Contact Us for information on how to access MSI files and Curriculum for C-STEM Schools.
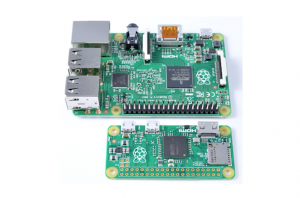
You can buy Linkbot, low-cost Arduino, and Raspberry Pi kits from our industrial partner Barobo, Inc.
1. Downloads for Windows
Windows Install Instructions Please install the software in the order listed below.
Ch Professional v8.0 for Windows
Linkbot Labs v1.1.6 for Windows
C-STEM Studio v5.5.2 for Windows
If you use Raspberry Pi installed with C-STEMbian accessing from Windows, download and install the following modules:
2. Downloads for Mac
Macintosh Install Instructions Please install the software in the order listed below.
Ch Professional v8.0 for Mac
Linkbot Labs v1.1.1 for Mac
C-STEM Studio v5.5.1 for Mac
For users upgrading from C-STEM Studio v4.x, please remove the C-STEM Studio icon from the docker manually first. Please see the FAQ for more information.
If you use Raspberry Pi installed with C-STEMbian accessing from Mac OS X, download and install the following modules:
3. Download C-STEMbian Including Ch, Linkbot Labs, and C-STEM Studio for Raspberry Pi
C-STEMbian is a superset of Raspbian, the default OS for Pi. C-STEMbian contains all features of Raspbian. In addition, C-STEMbian comes with C-STEM software including Ch Professional, C-STEM Studio, and Linkbot Labs preinstalled. The setup is optimized to more conveniently use the C-STEM curriculum.
-
-
-
Writing the Image to the SD Card – Windows
- To download the C-STEMbian Operating System click here
- Insert the SD card into your SD card reader and check which drive letter was assigned. You can easily see the drive letter, such as G:, by looking in the left column of Windows Explorer. You can use the SD card slot if you have one, or a cheap SD adapter in a USB port.
- Download the Win32DiskImager utility from the page as a zip file.
- Extract the executable from the zip file and run the Win32DiskImager utility; you may need to run this as administrator. Right-click on the file, and select Run as administrator. ( If you find that the download appears to be corrupt or the file is not unzipping correctly, please try using 7-Zip, which is bundled and have been installed along with Ch. For Windows 10, left click the lower left corner to bring up the Windows 10 user interface, hold the left button and scroll down to find “SoftIntegration Ch Professional”, then click “7-zip File Manager”. For Windows 7, click the command “Start”, “All Programs”, “SoftIntegration Ch Professional”, “7-zip File Manager”.)
- Select the image file you extracted earlier.
- Select the drive letter of the SD card in the device box. Be careful to select the correct drive; if you get the wrong one you can destroy the data on your computer’s hard disk! If you are using an SD card slot in your computer and can’t see the drive in the Win32DiskImager window, try using an external SD adapter.
- Click Write and wait for the write to complete. (It may take a few minutes depending on CPU speed of computers)
- Exit the imager and eject the SD card.
-
Writing the Image to the SD Card – Mac
-
-
- Download the C-STEMbian Operating System: click here. Make sure you download this file in Safari. Google Chrome will not allow you to unzip the file.

- Unzip the file”2017-08-03-c-stembian.img” by clicking on the zip file once it is finished downloading.
- Open a terminal and execute: diskutil list
- Connect the SD card to your computer with either usb adapter or external sd card holder.
- Execute: diskutil list again.
- Identify the disk of your SD card. You will see the external disk as below.
  /dev/disk2 (external, physical):
   #:                       TYPE NAME                    SIZE       IDENTIFIER
   0:     FDisk_partition_scheme                        *31.9 GB    disk2
   1:             Windows_FAT_32 NO NAME                 31.9 GB    disk2s
- Unmount your SD card by executing: diskutil unmountDisk /dev/disk2
- Download the C-STEMbian Operating System: click here. Make sure you download this file in Safari. Google Chrome will not allow you to unzip the file.
-
- Unzip the file you downloaded above, for example:
cd ~/Downloads
unzip image_2017-08-03-c-stembian.zip
you will get 2017-08-03-c-stembian.img -
-
- Burn the image file to your SD card by executing: sudo dd bs=1m if=/path/to/your/image.img of=/dev/disk2 For example:
sudo dd bs=1m if=~/Downloads/2017-08-03-c-stembian.img of=/dev/disk2
This will take a few minutes, depending on the image size and the speed of your Mac machine. -
-
-
Follow the instructions here on the menu at the left to access Pi from your laptop.
-
-
Method B
We strongly recommend C-STEM users to install C-STEMbian in Pi as C-STEMbian is setup to more conveniently use the C-STEM Math-ICT curriculum and many other components. However, if you’ve already have a Raspberry Pi with Raspbian running on it, you can install C-STEM Math-ICT curriculum related only software modules individually. Please make sure your Pi is running Raspbian Jessie or higher.-
Setup
- Open a terminal (Ctrl+Alt+T)
- Execute the following commands in the terminal.
wget http://www.c-stembian.org/rpi/public.key -O - | sudo apt-key add -echo 'deb http://www.c-stembian.org/rpi jessie main' | sudo tee --append /etc/apt/sources.listwget http://repo.barobo.com/barobo.public.key -O - | sudo apt-key add -echo 'deb http://repo.barobo.com jessie main' | sudo tee --append /etc/apt/sources.listsudo apt-get update
-
Install C-STEM Software
sudo apt-get install cstemstudio -y
-
Install Ch Professional
sudo apt-get install ch -y
-
Install C-STEM Studio
sudo apt-get install cstemstudio -y
-
Install Linkbot Labs
sudo apt-get install linkbotlabs libqt5webkit5 -y
-
Upgrade C-STEM Software
sudo apt-get updatesudo apt-get upgrade -y
-

4. Notes:
-
-
- If you encounter any issues during the installation, please make sure you check the software installation session of the FAQ first before contacting us.
- You can check the revision histories for detailed new features in the latest releases
- Ch Professional Edition for Raspberry Pi is free for non-commercial use. Ch Professional Edition for Windows and Mac has 40 days of a trial period. You can purchase a lab license with C-STEM discount.
-
———————————————————————————————————————————————————
If you encounter any other issues, please Contact Us. We will make our best effort to get back to you as soon as we can.